Eye candy pigments transform clear epoxy into vibrant art! These additions, like mica or inks, offer endless creative possibilities for beginners and experienced artists alike.
Resin art’s rising popularity stems from extraordinary results and enjoyable techniques, making it a captivating hobby for many crafters seeking unique projects.
Concentrated pigments, such as Rolio paste, require minimal amounts for impactful color, demonstrating that a little product yields significant aesthetic changes within the resin.
Epoxy’s strong bonding capabilities, combined with the visual appeal of pigments, make it ideal for diverse applications, from carpentry to decorative art pieces.
Stock footage showcases the versatility of epoxy resin crafts, highlighting construction and artistic applications, further emphasizing its widespread appeal and creative potential.
What are Eye Candy Pigments?
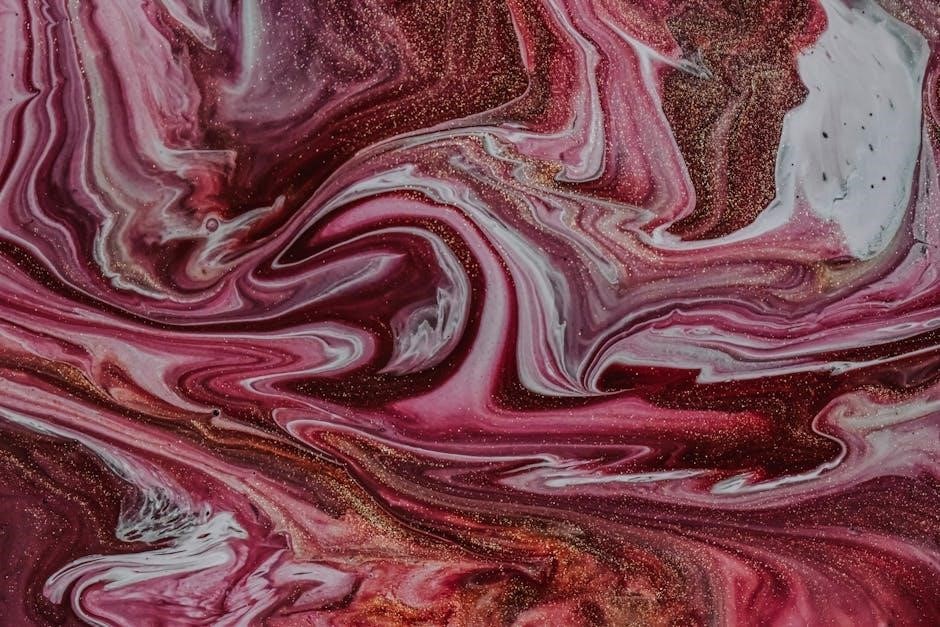
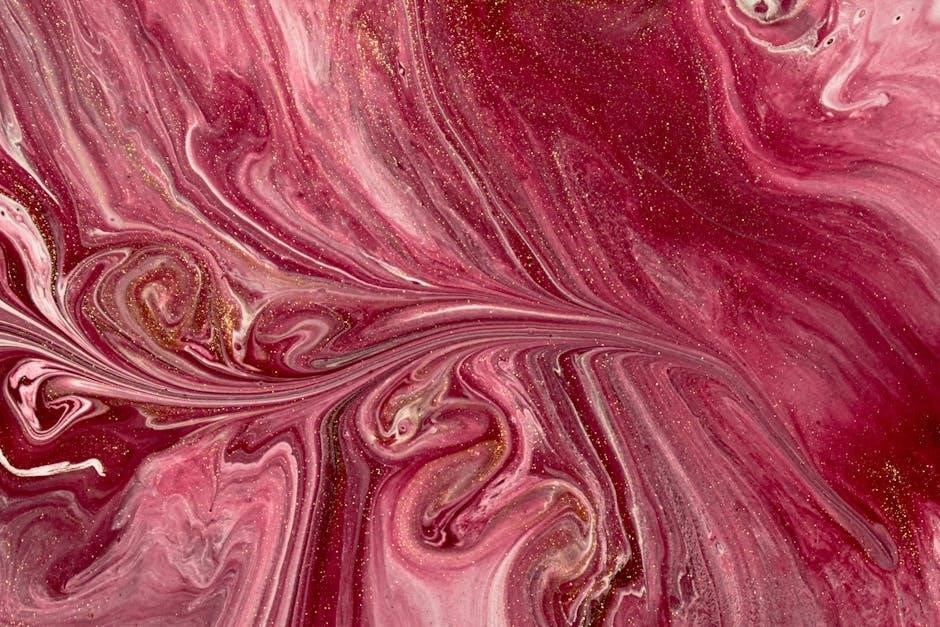
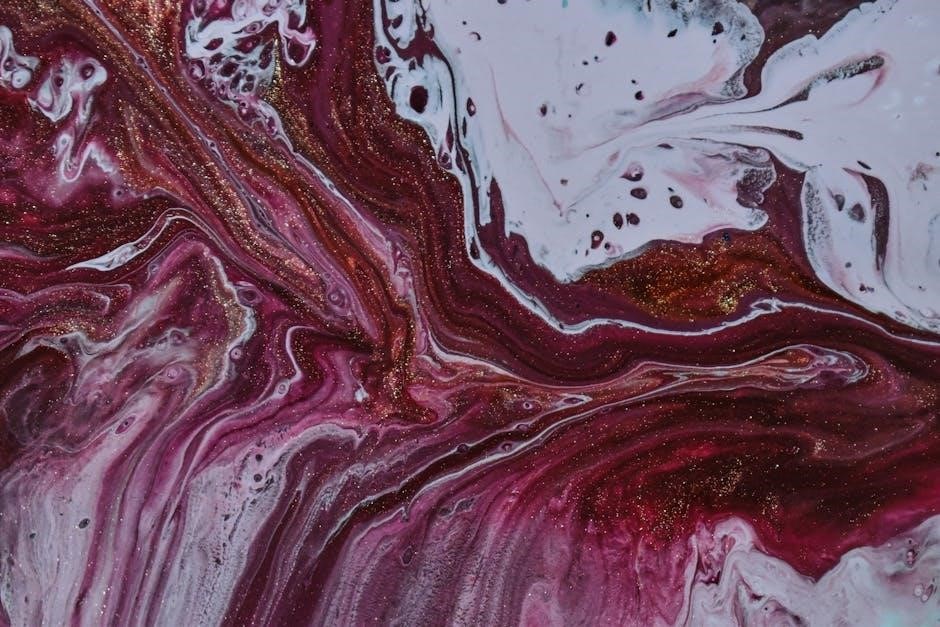
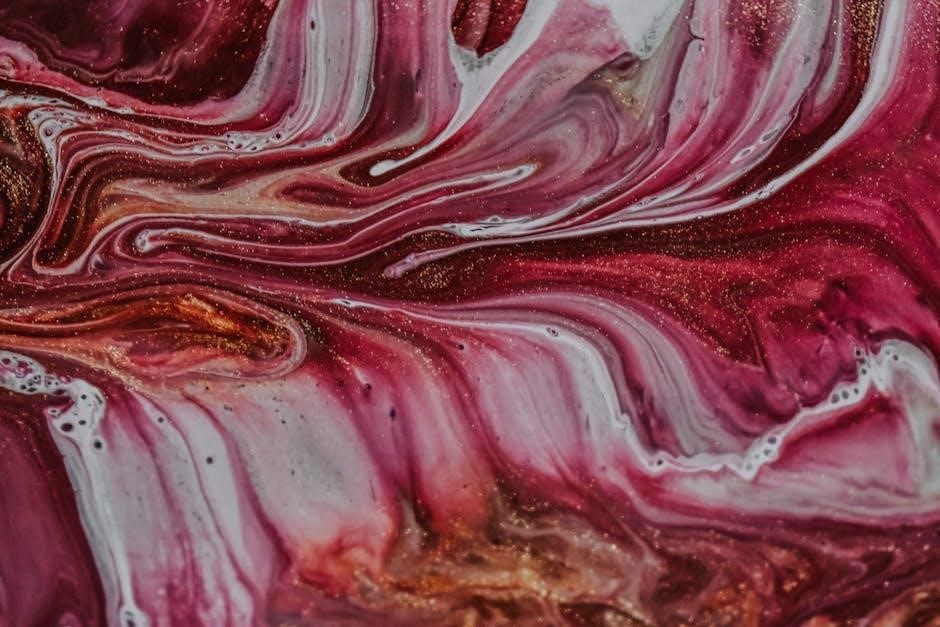
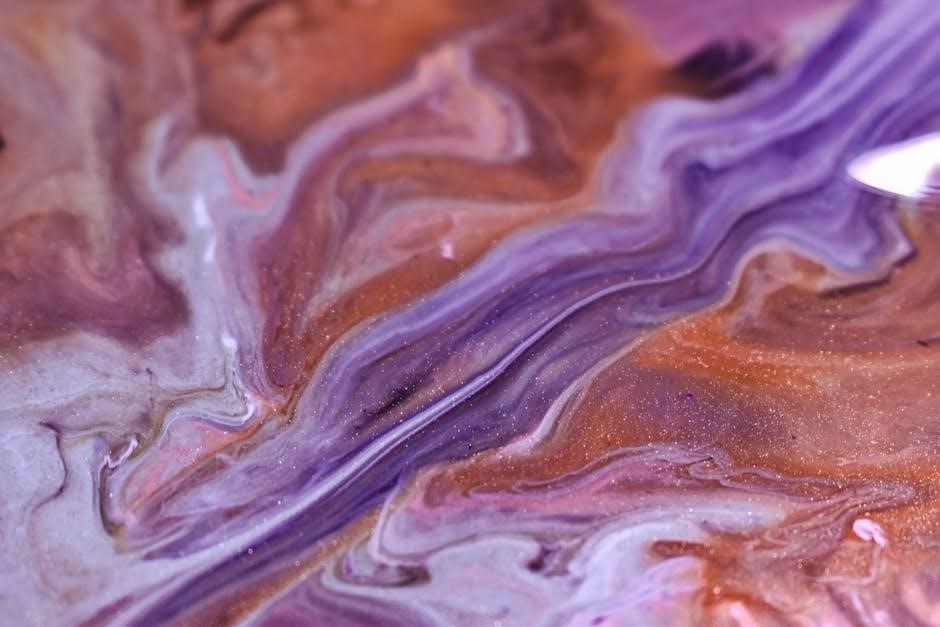
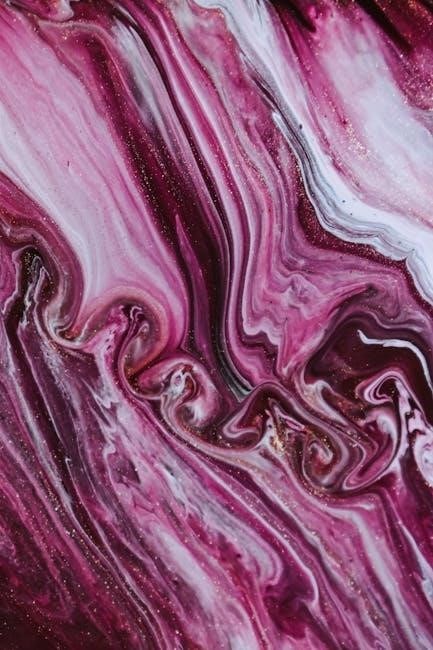
Eye candy pigments are intensely colored powders, pastes, or liquids designed to add visual interest to epoxy resin creations. They aren’t simply colorants; they’re about achieving specific effects. Mica powders, for instance, offer pearlescent shimmers, while alcohol inks create flowing, ethereal designs. Glitter, of course, provides sparkle and dimension.
These pigments differ from traditional dyes because they contain particles that reflect light, resulting in depth and vibrancy. A little goes a long way, as concentrated pastes like Rolio demonstrate, offering significant color impact with minimal addition. They elevate epoxy resin from a clear coating to a medium for stunning, artistic expression, allowing for unique and captivating results.
The popularity of DIY resin art is fueled by the extraordinary outcomes achievable with these pigments, making them essential for both beginners and seasoned artists.
Why Use Eye Candy Pigments?
Eye candy pigments unlock a world of creative possibilities within epoxy resin art. They transform simple projects into visually striking pieces, adding depth, shimmer, and unique effects unattainable with clear resin alone. The rising popularity of DIY resin is directly linked to the extraordinary results these pigments enable.
Using pigments allows for customization and personalization, letting artists achieve specific aesthetics. Whether it’s a subtle pearlescent sheen or a bold, vibrant color cell, the options are limitless. Furthermore, pigments enhance the perceived value of resin creations, making them ideal for gifts or sales.
Epoxy’s strong bonding, combined with pigment artistry, creates durable and beautiful items, from functional coasters to captivating jewelry.
Types of Eye Candy Pigments
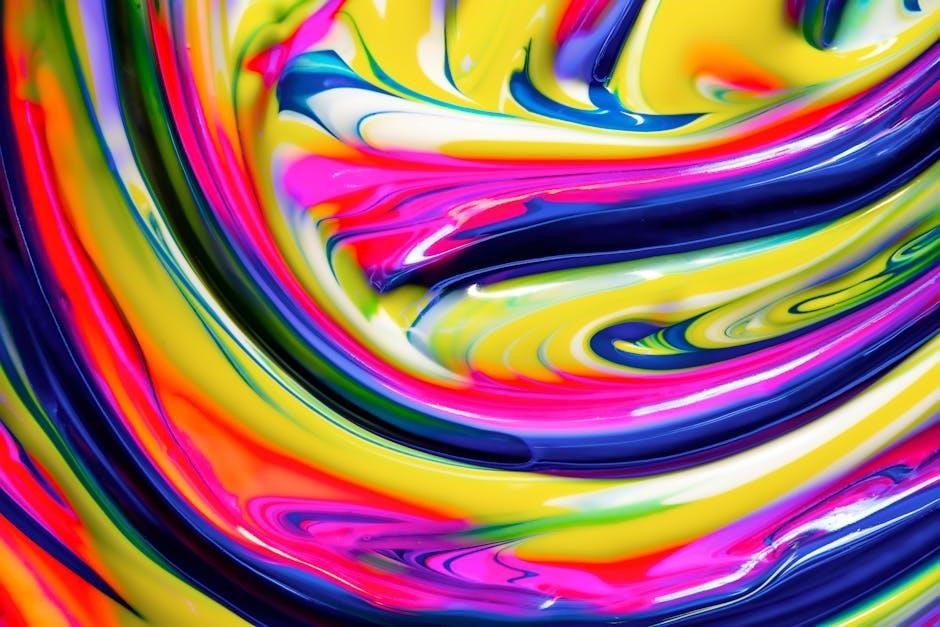
Diverse pigments – mica, glitter, alcohol inks, and pearlescent options – offer unique textures and effects in epoxy resin. Each type contributes distinct visual characteristics.
Mica Powders
Mica powders are a popular choice for adding shimmer and pearlescent effects to epoxy resin creations. These finely ground minerals offer a wide spectrum of colors, from subtle neutrals to vibrant, eye-catching hues.
When incorporating mica into resin, remember that a little goes a long way, as demonstrated by concentrated pigment pastes like Rolio. Start with a small amount and gradually add more until you achieve the desired level of opacity and shimmer.
Mica’s versatility allows for creating stunning effects, enhancing the visual appeal of projects like coasters, jewelry, and decorative lamps, as seen in resin art tutorials.
Glitter
Glitter introduces sparkle and dynamic visual texture to epoxy resin projects, ranging from fine dusts to chunky flakes. Its reflective properties create captivating effects, especially when light interacts with the cured resin.
Similar to mica powders, glitter’s impact is significant even in small quantities, echoing the principle that concentrated pigments require careful application. Consider the glitter size; finer glitter disperses more evenly, while larger flakes create bolder statements.
Glitter complements various resin art forms, enhancing decorative lamps, jewelry, and coasters, as showcased in online tutorials and stock footage of epoxy resin crafts.
Alcohol Inks
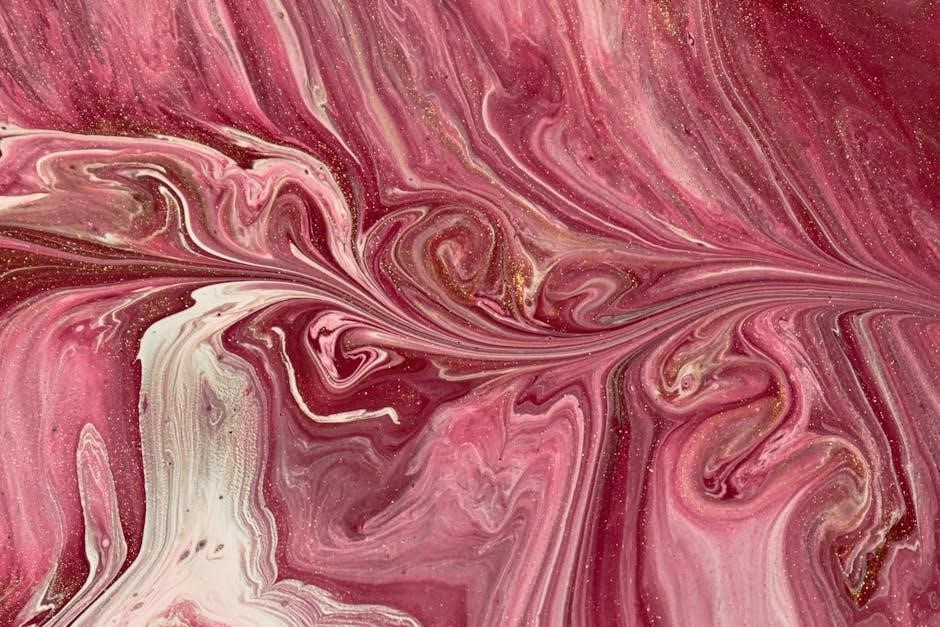
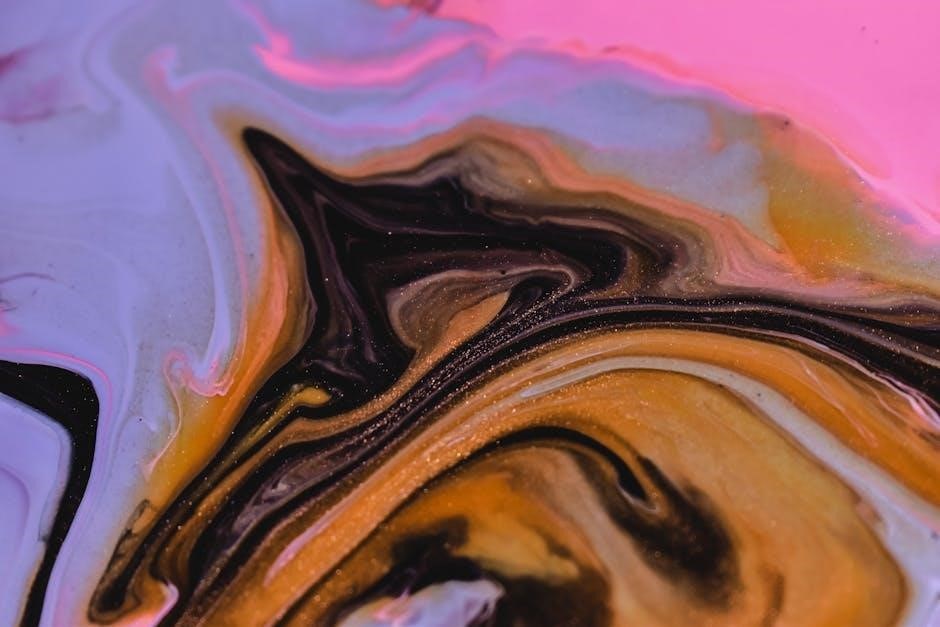
Alcohol inks offer vibrant, translucent color and unique cell-like effects within epoxy resin. Their fluidity allows for organic patterns and blends, creating depth and dimension. Unlike opaque pigments, inks maintain some transparency, letting light pass through the resin.
When incorporating alcohol inks, remember that a little goes a long way, mirroring the concentrated nature of Rolio pigment pastes. Experiment with dropping inks directly into resin or pre-mixing them for controlled color distribution.
These inks are ideal for artistic projects like decorative lamps and trays, enhancing the visual appeal of epoxy resin crafts, as demonstrated in online tutorials and stock footage.
Pearlescent Pigments
Pearlescent pigments introduce a shimmering, iridescent effect to epoxy resin, mimicking the luster of pearls. These pigments contain tiny mica flakes coated with metal oxides, reflecting light for a captivating visual appeal. They add elegance and sophistication to resin art projects.
Similar to alcohol inks and Rolio pastes, pearlescent pigments are highly concentrated, requiring careful measurement during mixing. Start with small amounts and gradually increase until the desired shimmer is achieved.
Pearlescent effects are particularly stunning in jewelry and pendants, enhancing the beauty of the resin and creating eye-catching pieces, as seen in various online tutorials.
Essential Tools and Materials
Successful resin art demands quality epoxy, precise mixing tools, and safety gear. Strong bonds are achieved with epoxies, crucial for diverse projects and lasting results.
Epoxy Resin Selection
Choosing the right epoxy resin is paramount for vibrant, lasting results with eye candy pigments; Consider the project’s size and desired curing time; options range from fast-curing for smaller pieces to slow-curing for larger, more complex designs.
Epoxies offer strong, durable bonds suitable for various materials like wood, plastic, and metal, making them versatile for diverse crafts. Look for resins specifically formulated for art, as these often have lower viscosity, reducing bubble formation.
Furthermore, UV resistance is crucial to prevent yellowing and maintain the pigments’ brilliance over time. Selecting a high-quality epoxy ensures optimal pigment dispersion and a professional finish, enhancing the overall aesthetic appeal of your resin artwork.
Mixing Cups and Stir Sticks
Precise measurement and thorough mixing are vital when incorporating eye candy pigments into epoxy resin. Utilize graduated mixing cups – silicone or plastic – for accurate resin-to-hardener ratios. Avoid using paper or foam cups, as epoxy can react with these materials.
Opt for stir sticks made of wood or plastic; these prevent contamination and ensure complete pigment dispersion. Rounded stick ends minimize bubble creation during mixing. Discard used stir sticks responsibly after each use.
Having multiple cup sizes is beneficial for smaller pigment tests or larger project batches. Proper tools contribute to a smooth, bubble-free resin mixture, maximizing the vibrancy and clarity of your final artwork.
Safety Equipment (Gloves, Mask, Eye Protection)
Prioritizing safety is paramount when working with epoxy resin and eye candy pigments. Always wear nitrile gloves to prevent skin contact, as epoxy can cause irritation or allergic reactions. A respirator mask is crucial, protecting your lungs from potentially harmful fumes released during mixing and curing.
Eye protection, such as safety glasses or goggles, shields your eyes from splashes or accidental contact. Ensure adequate ventilation in your workspace to minimize fume inhalation.
Proper disposal of used gloves and stir sticks is also essential. Following these precautions ensures a safe and enjoyable resin art experience.
Molds and Release Agents
Selecting the right mold is key to achieving desired shapes in your epoxy resin projects. Silicone molds are popular due to their flexibility and non-stick properties, allowing for easy demolding. However, other materials like plastic can also be used, depending on the project.
Applying a release agent, such as mold release spray or petroleum jelly, prevents the resin from permanently bonding to the mold. This ensures clean removal of your finished piece.
Proper mold preparation is crucial for flawless results and extends the lifespan of your molds, enabling repeated use for future creations.
Mixing Instructions: A Step-by-Step Guide
Precise resin and hardener ratios are vital for proper curing. Slow or fast-curing resins react differently with pigments, impacting the final result and project timeline.
Calculating Resin and Hardener Ratios
Accurate measurement is paramount when working with epoxy resin. Most resins require a specific mix ratio, typically by volume (e.g., 1:1, 2:1) or weight, as indicated by the manufacturer. Always refer to your resin’s instructions for the correct ratio; deviations can lead to a sticky, uncured, or brittle final product.
Using digital scales for weight-based ratios offers superior precision compared to measuring cups. For volume measurements, ensure your cups have clear markings. Thoroughly mix the resin and hardener before introducing any eye candy pigments. This initial mixing ensures complete chemical bonding, which is crucial for a successful cure and optimal pigment dispersion.
Incorrect ratios can also affect the resin’s clarity and viscosity, potentially impacting the appearance of your project.
Slow vs. Fast-Curing Resins & Pigment Impact
Resin curing speed significantly impacts your project’s timeline and working ease. Slow-curing resins offer extended work times, ideal for intricate designs and layering pigments, minimizing rushed applications. However, they require longer dust-free periods. Fast-curing resins set quickly, suitable for smaller projects or when a rapid finish is needed, but offer less manipulation time.
Adding eye candy pigments can subtly influence curing times. Highly concentrated pigments, like Rolio paste, may slightly extend the curing process due to their density. Always test a small batch with your chosen pigment to observe any changes.
Consider the project’s complexity and desired aesthetic when selecting a resin type, factoring in the pigment’s potential impact on the overall cure.
Proper Mixing Techniques (Avoiding Bubbles)
Bubble formation is a common challenge in epoxy resin art, but preventable with careful technique. Begin by slowly stirring the resin and hardener together, avoiding vigorous whisking that introduces air. Scrape the sides and bottom of the mixing container frequently to ensure thorough incorporation.
When adding eye candy pigments, gently fold them into the resin mixture rather than stirring aggressively. This minimizes air entrapment. Allow the mixed resin to sit for a few minutes; this allows bubbles to rise to the surface.
Utilize a heat gun or torch briefly to pop surface bubbles before pouring into your mold. Patience and deliberate movements are key to a crystal-clear finish.
Pigment Incorporation Techniques
Experiment with adding pigments directly to resin, layering for depth, or creating captivating color cells. These techniques unlock unique visual effects within your epoxy projects!
Adding Pigment Directly to Resin
Direct pigment addition is a foundational technique for vibrant epoxy creations. Begin by carefully measuring your epoxy resin and hardener, ensuring accurate ratios for proper curing – crucial for any project.
Once mixed, slowly incorporate your chosen eye candy pigment, stirring gently to avoid introducing excessive bubbles. Remember, a little concentrated pigment, like Rolio paste, goes a long way, offering significant color impact.
Thoroughly combine the pigment until a uniform color is achieved, but avoid vigorous mixing that can trap air. This method is ideal for achieving solid, consistent hues throughout your resin piece, forming the base for more complex effects;
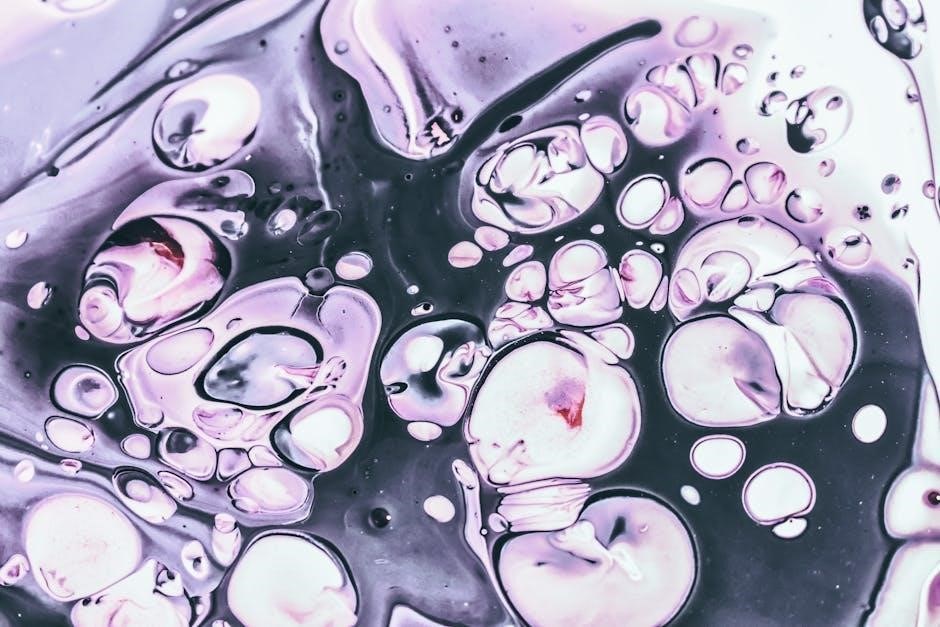
Creating Color Cells and Effects
Color cells emerge through strategic pigment layering and density differences. After initially mixing pigment directly into resin, introduce contrasting colors in small drops onto the surface.
Gentle swirling with a toothpick or heat gun encourages pigment separation, forming captivating cell-like patterns. Remember, slow curing resins offer extended working time for intricate designs.
Experiment with varying pigment concentrations; denser pigments sink, creating depth, while lighter shades float, enhancing visual interest. This technique, combined with epoxy’s bonding strength, yields extraordinary, unique art pieces.
The popularity of DIY resin stems from these extraordinary results!
Layering Pigments for Depth
Layering pigments builds dimension and complexity within epoxy resin art. Begin with a base layer of translucent color, allowing it to partially cure before adding subsequent shades.
This prevents excessive blending and maintains distinct color separation. Employ contrasting hues – dark tones at the bottom, lighter shades on top – to simulate depth.
Consider incorporating pearlescent pigments between layers for a shimmering effect. Remember, a little concentrated pigment goes a long way, ensuring vibrant yet controlled results. Epoxy’s strong bonding creates lasting, visually stunning pieces.
The technique is fun to do and the projects are extraordinary!
Troubleshooting Common Issues
Common issues like bubbles, uneven pigment distribution, or improper curing can occur. Careful mixing, correct ratios, and patience are key to achieving flawless results!
Bubbles in Resin
Bubbles are a frequent challenge when working with epoxy resin, often introduced during the mixing process. Vigorous stirring can trap air, leading to unsightly bubbles in the finished piece. To minimize this, employ slow, deliberate mixing techniques, scraping the sides and bottom of the container.
A heat gun or torch can gently remove surface bubbles; however, exercise caution to avoid overheating the resin. Allowing the resin to sit for a short period after mixing can also help bubbles rise and dissipate naturally. Remember, proper mixing is crucial, but so is patience in allowing air to escape before pouring.
Incorrect pigment ratios or fast-curing resins can exacerbate bubble formation, so consider these factors when troubleshooting.
Uneven Pigment Distribution
Achieving consistent color throughout your epoxy resin project requires thorough pigment incorporation. Simply adding pigment directly to the resin isn’t always enough; proper mixing is paramount. Insufficient stirring can result in streaks or patches of concentrated color, detracting from the final aesthetic.
Ensure the pigment is fully dispersed by mixing slowly but deliberately, scraping the sides and bottom of the container to prevent settling. Remember, some pigments are highly concentrated, requiring only small amounts – overdoing it can make even mixing more difficult.
Experiment with different mixing techniques to find what works best for your chosen pigment type and resin system.
Resin Not Curing Properly
Incomplete curing is a frustrating issue, often stemming from incorrect resin-to-hardener ratios. Accurate measurement is crucial; even slight deviations can inhibit the chemical reaction needed for hardening. Pigments, while beautiful, can sometimes interfere with this process, especially in larger concentrations.
Slow vs. fast-curing resins react differently to pigment additions. Some pigments may slightly extend curing times, so monitor your project closely. Ensure thorough mixing, as unmixed resin and hardener will remain uncured.
Always follow the manufacturer’s instructions and consider a small test batch before committing to a large project.
Finishing and Polishing
Achieving a flawless finish requires sanding to remove imperfections, followed by buffing for clarity. A UV protective coating safeguards your vibrant, pigmented epoxy artwork from fading.
Sanding and Buffing
Sanding is crucial for removing any surface imperfections, dust particles, or unevenness that may have occurred during the curing process. Begin with a coarser grit sandpaper – around 220 – to address significant flaws, gradually increasing to finer grits like 400, 600, and even 800 for a polished surface.
Wet sanding is highly recommended, using water as a lubricant to prevent the sandpaper from clogging and to create a smoother finish; After sanding, thoroughly clean and dry the resin piece before proceeding to buffing.
Buffing restores shine and enhances the vibrancy of the eye candy pigments. Utilize a polishing compound and a buffing wheel attached to a rotary tool. Apply gentle pressure and work in circular motions to achieve a high-gloss, professional-looking result.
Applying a UV Protective Coating
UV exposure can cause epoxy resin to yellow over time, diminishing the brilliance of your eye candy pigments. Applying a UV protective coating safeguards your artwork, preserving its vibrant colors and clarity for years to come.
Choose a spray-on or brush-on UV resistant coating specifically designed for epoxy resin. Ensure the surface is completely clean, dry, and free of dust before application. Apply thin, even coats, allowing each layer to fully cure according to the manufacturer’s instructions.
Multiple coats are often recommended for optimal protection. This creates a robust barrier against harmful UV rays, preventing fading and discoloration, and ensuring your resin art remains stunning.
Safety Precautions When Working with Epoxy Resin
Prioritize safety with proper ventilation and protective gear! Gloves, masks, and eye protection are crucial when handling epoxy and pigments during mixing.
Ventilation and Workspace Setup
Adequate ventilation is paramount when working with epoxy resin and eye candy pigments. Epoxy fumes can be irritating, so work in a well-ventilated area, ideally with an open window or a dedicated exhaust fan.
A dedicated workspace, covered with a protective layer like plastic sheeting or newspaper, will safeguard your surfaces from spills and drips.
Ensure the area is free from dust and debris, as these can contaminate your resin and affect the final finish.
Good lighting is also essential for accurate pigment mixing and bubble detection.
Consider the temperature; most epoxies perform best between 70-75°F (21-24°C).
Finally, keep children and pets away from the workspace during the entire process.
Handling and Disposal of Resin
Always wear gloves when handling epoxy resin and pigments to prevent skin contact and potential allergic reactions. Protective eyewear is also crucial to shield your eyes from splashes.
Avoid direct contact with skin; if contact occurs, wash immediately with soap and water.
Uncured resin should not be poured down the drain. Allow it to harden completely, then dispose of it as solid waste according to local regulations.
Resin-contaminated materials, like mixing cups and stir sticks, should also be fully cured before disposal.
Never reuse mixing containers.
Store resin and hardener in a cool, dry place, away from direct sunlight and heat sources.
Inspiration and Project Ideas
Explore diverse projects like vibrant coasters, unique trays, or personalized jewelry using epoxy resin and eye candy pigments for stunning, artistic creations!
Coasters and Trays
Coasters and trays are fantastic beginner projects for exploring eye candy pigments in epoxy resin. Start by pouring a thin layer of clear epoxy into your mold, then strategically add mica powders, glitter, or alcohol inks.
Experiment with swirling techniques to create mesmerizing patterns, or layer different pigments for depth and dimension. Remember, a little pigment goes a long way, especially with concentrated pastes like Rolio!
Consider embedding dried flowers or other small objects within the resin for added visual interest. Once cured, these functional art pieces showcase the beauty and versatility of epoxy resin crafts.
Sanding and polishing will reveal a glossy, professional finish, making these coasters and trays perfect for gifting or personal use.
Jewelry and Pendants
Jewelry and pendants offer a smaller scale for showcasing vibrant eye candy pigments within epoxy resin. Silicone molds in various shapes – hearts, circles, or custom designs – are ideal for creating unique pieces.
Carefully mix your resin and hardener, then incorporate pigments like pearlescent powders or finely ground glitter for a dazzling effect. Layering colors can mimic gemstones or create abstract art within the pendant.
Embedding small charms or beads adds another layer of personalization. Remember to degas the resin to eliminate bubbles, ensuring a clear and flawless finish.
Once cured, sand and polish for a professional shine, then attach a bail for creating a stunning necklace or earring component.