
Welcome to your comprehensive guide for mastering Blackstone grills! This detailed resource covers setup, seasoning, safety, and maintenance, ensuring a perfect grilling experience for all users.
1.1 Overview of Blackstone Grills
Blackstone grills are a top choice for outdoor cooking enthusiasts, offering durability and versatility. Known for their high-quality construction, these grills feature a robust cooking surface and excellent heat distribution. Available in various models, including the popular 36-inch griddle and 28-inch XL series, Blackstone grills cater to both beginners and experienced cooks. Their designs emphasize ease of use, with features like adjustable burners and a spacious cooking area. Whether for breakfast, dinner, or advanced grilling techniques, Blackstone grills are a reliable option for achieving professional-grade results in the comfort of your backyard.
1.2 Importance of Proper Instructions
Proper instructions are essential for maximizing the performance and longevity of your Blackstone grill. Clear guidance ensures safe operation, prevents damage, and enhances cooking results. Without proper setup and seasoning, the grill may not perform optimally, leading to uneven cooking or surface damage. Additionally, understanding safety protocols, like correct shutdown procedures, is crucial to avoid hazards. Adhering to the provided instructions helps users unlock their grill’s full potential, ensuring a seamless and enjoyable cooking experience while maintaining the product’s warranty and overall durability.
1.3 Brief History of Blackstone Grills
Blackstone Products, founded in 2005, revolutionized outdoor cooking with its innovative griddles and grills. The company, based in Utah, USA, introduced the first Blackstone Griddle, designed for portability and even heat distribution. This product quickly gained popularity for its versatility and durability. Over the years, Blackstone expanded its range to include grills, accessories, and cooking solutions, becoming a leader in the outdoor cooking market. Their commitment to quality and innovation has made Blackstone a trusted name among grilling enthusiasts, offering products that combine tradition with modern convenience for unforgettable cooking experiences.

Getting Started with Your Blackstone Grill
Welcome to your Blackstone Grill journey! This section guides you through unboxing, initial setup, and understanding your grill’s components to ensure a smooth and safe start.
2.1 Unboxing and Initial Setup
Unboxing your Blackstone Grill is an exciting first step! Carefully remove the grill from the box and place it on a flat, stable surface. Lay the unit upside down as shown in the diagram to access the legs and components. Install the wheels and braces according to the instructions, ensuring all parts are securely tightened. Once assembled, double-check that all components are properly attached and the grill is level. Before first use, read the manual thoroughly and ensure the area is well-ventilated. This setup ensures safety and prepares your grill for seasoning and cooking.
2.2 Understanding the Components
Familiarizing yourself with your Blackstone Grill’s components is essential for optimal use. The grill features burners for heat control, a durable griddle surface for cooking, and a propane tank for fuel. The unit also includes wheels for easy mobility and a grease management system to simplify cleaning. Understanding each part’s function ensures safe and efficient operation. Take time to identify the ignition, temperature controls, and drainage system. Refer to your manual for specific details on your model’s components, as some may vary. Knowing your grill inside out enhances your grilling experience and helps maintain its performance over time.
2.3 Safety Precautions Before First Use
Before using your Blackstone Grill, ensure a safe setup and operation. Always read the user manual thoroughly and follow the manufacturer’s guidelines. Inspect the grill for any damage or leaks, especially in the propane connections. Ensure the grill is placed on a level, heat-resistant surface away from flammable materials. Keep children and pets at a safe distance. Never leave the grill unattended while in use. Properly light the burners as instructed, and avoid using excessive propane. Allow the grill to cool before cleaning or storing. Following these precautions ensures a safe and enjoyable grilling experience.
Seasoning Your Blackstone Grill
Seasoning is the first step to achieving perfectly cooked dishes. Use plant-based oil or animal fat to create a non-stick surface and protect your grill from rust.
3.1 Why Seasoning is Crucial
Seasoning your Blackstone grill is essential for preventing rust and creating a non-stick surface. It protects the metal, enhances durability, and ensures food cooks evenly without sticking. Proper seasoning also maintains the grill’s performance over time, making cleaning easier and preventing damage from harsh weather. Regular maintenance of the seasoning ensures your grill remains in optimal condition for years of delicious cooking. A well-seasoned grill is key to achieving perfect sears and flavors in every dish. Neglecting this step can lead to a degraded cooking surface and potential rust issues, so it’s crucial to season correctly from the start.
3.2 Materials Needed for Seasoning
To season your Blackstone grill, you’ll need a few essential materials. Start with a high-smoke-point cooking oil, such as vegetable or canola oil, or plant-based alternatives. Paper towels are necessary for applying and wiping excess oil. For cleaning, a stiff brush or scouring pad helps remove debris. Optional items include gloves for protection and a cleaning solution for pre-seasoning prep. Ensure all materials are food-safe to avoid contamination. These tools will help you achieve a durable, non-stick surface for optimal grilling performance. Proper preparation is key to a successful seasoning process.
3.3 Step-by-Step Seasoning Process
Start by cleaning the griddle surface thoroughly with a stiff brush or scouring pad to remove any dirt or residue. Next, apply a thin, even layer of high-smoke-point oil, such as vegetable or canola oil, using paper towels. Heat the griddle on medium-low heat for about 30 minutes to allow the oil to penetrate the metal. Use a clean paper towel to spread the oil evenly, ensuring full coverage. Let it cool slightly before wiping off any excess oil with a clean towel. Repeat this process 2-3 times for a durable, non-stick surface. Proper seasoning ensures optimal grilling performance and longevity.

Assembling Your Blackstone Grill
Assembling your Blackstone grill involves unboxing, laying it upside down, installing wheels, and attaching braces. Follow the manual step-by-step for a secure setup. Patience ensures proper assembly.
4.1 Tools and Hardware Required
Assembling your Blackstone grill requires specific tools and hardware. Ensure you have a wrench, screwdriver, and Allen key for tightening bolts and screws. The grill comes with essential hardware like bolts, washers, and screws. Refer to the manual for a detailed list of included parts. Organize all components before starting to avoid missing pieces. Proper tools ensure a secure and efficient assembly process. Double-check the packaging for any additional accessories or instructions provided with your model. Having everything ready simplifies the assembly experience and ensures your grill is set up correctly for safe and optimal use.
4.2 Assembly Instructions for Different Models
Assembly instructions vary slightly depending on your Blackstone grill model. For most models, start by unboxing and organizing all components. Attach the legs and wheels to the base using the provided bolts. Next, install the burners and connect the propane hoses according to the manual. For griddles with hoods, attach the hood and ensure proper alignment. Accessories like side shelves or drawers are installed last. Always refer to your specific model’s manual for precise steps, as some variations may require additional parts or adjustments. Taking your time ensures a secure and functional setup tailored to your grill’s design.
4.3 Common Assembly Mistakes to Avoid
When assembling your Blackstone grill, avoid common mistakes like overtightening bolts, which can damage threads. Ensure all parts are properly aligned before securing them. Misaligned components can lead to uneven cooking surfaces. Another mistake is not following the correct order of assembly, which can result in instability. Additionally, failing to connect propane hoses correctly can pose safety risks. Always double-check that all connections are secure and leak-free. Finally, avoid skipping steps in the manual, as this can lead to missing or improperly installed parts. Taking your time and following the instructions carefully ensures a safe and functional setup.
Safety Guidelines for Blackstone Grill
Ensure safe grilling by following proper shutdown procedures, handling propane carefully, and maintaining a clean, well-maintained grill to prevent accidents and ensure optimal performance always.
5.1 Proper Shutdown Procedures
To safely shut down your Blackstone grill, turn all burners to the “LOW” setting and allow them to burn for a few minutes. Gradually turn each burner off one by one. Close the propane tank valve to stop gas flow. Let the grill cool completely before covering it. Never leave a hot grill unattended. Proper shutdown prevents gas buildup and potential ignition hazards. Always follow these steps to ensure safety and maintain your grill’s performance. Regularly inspect hoses and connections for leaks to avoid accidents. A safe shutdown routine is essential for protecting your grill and surroundings.
5.2 Handling Propane Safely
Proper propane handling is crucial for safe grilling. Always store propane tanks upright in a well-ventilated area, away from heat sources and flammable materials. Before connecting, inspect hoses for cracks or damage. Use a soapy water solution to check for leaks at connections—bubbles indicate a leak. Never transport propane while the grill is in use. Keep the tank valve closed when not in use. Follow manufacturer guidelines for tank size and pressure. Regularly inspect connections and replace worn parts. Proper propane safety prevents accidents and ensures a secure grilling experience. Always prioritize caution when handling propane equipment.
Cooking Techniques on Blackstone Grill
Master various cooking techniques to enhance your grilling experience. Learn temperature control, oil usage, and how to cook meats, vegetables, and breakfast dishes perfectly every time.
6.1 Temperature Control Tips
Mastering temperature control is key to achieving perfect results on your Blackstone grill. Always preheat the griddle for 10-15 minutes before cooking to ensure even heat distribution. Use the burner knobs to adjust heat zones, allowing for precise control over different areas of the griddle. For delicate foods like eggs or pancakes, keep the heat on medium-low to prevent burning. When searing meats, crank the heat to high initially, then reduce it to medium to finish cooking. Regularly monitor the temperature using the built-in thermometer to maintain optimal cooking conditions. This ensures your dishes are cooked to perfection every time.
6.2 Oil and Lubrication Best Practices
Proper oiling and lubrication are essential for maintaining your Blackstone grill’s performance and longevity. Use food-safe, high-smoke-point oils like avocado or vegetable oil for seasoning and cooking. Apply a thin, even layer to the griddle surface before heating to prevent rust and ensure non-stick cooking. Avoid using butter or olive oil, as they can burn easily. After cooking, wipe off excess food residue and apply a light coat of oil to maintain the seasoning. Regular lubrication keeps the griddle surface smooth and ready for the next use, ensuring optimal grilling results every time.
6.3 Cooking Different Types of Food
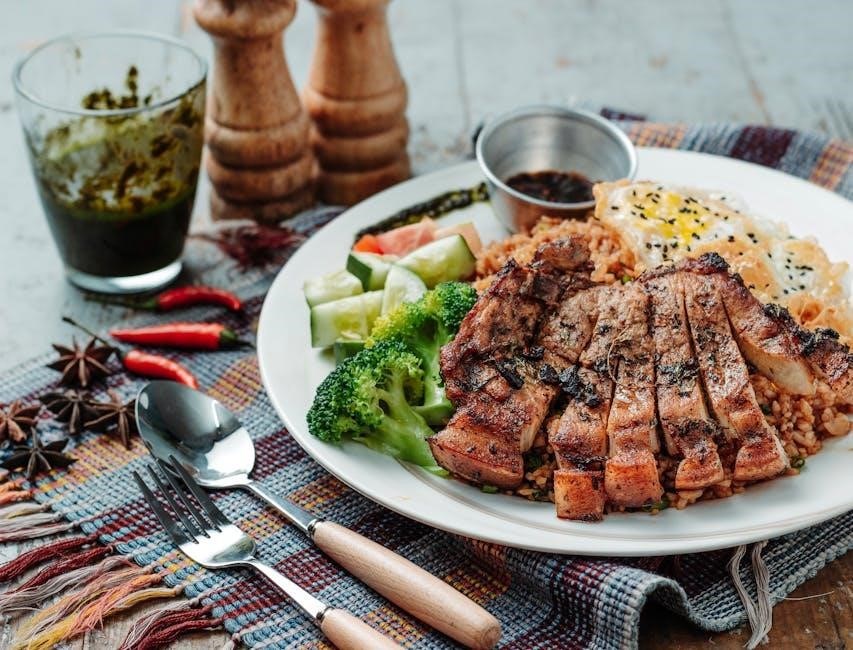
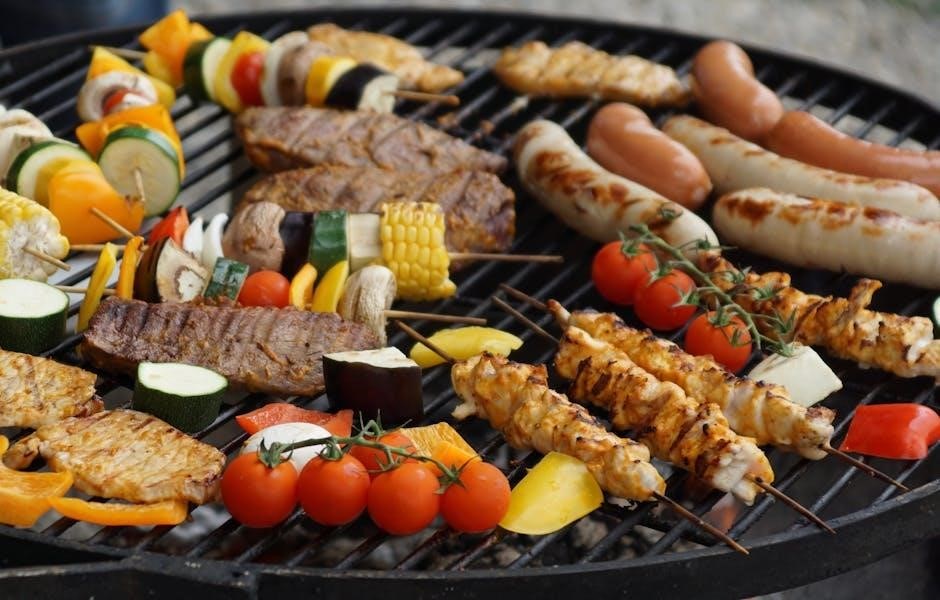
Your Blackstone grill is versatile, allowing you to cook a wide variety of dishes. For breakfast, try pancakes, eggs, and bacon, using the griddle’s even heat distribution. Achieve perfectly seared steaks by preheating the grill and using oil to prevent sticking. Vegetables like asparagus and bell peppers roast beautifully when brushed with oil and seasoned. Adjust heat zones to cook delicate foods like fish or shrimp without burning. Experiment with flatbreads and pizzas for a crispy crust. Use the griddle’s surface to sauté stir-fries or sear scallops. The key is to preheat properly, use the right oils, and adjust cooking times for each food type.
Cleaning and Maintenance
Regular cleaning and maintenance ensure your Blackstone grill performs optimally. Scrape off residue, wipe surfaces, and re-season as needed to maintain its durability and cooking efficiency.
7.1 Post-Cooking Cleaning Routine
After each use, turn off the burners and let the grill cool slightly. Use a scraper to remove food residue from the griddle surface. Wipe it down with paper towels, then apply a thin layer of oil to maintain seasoning. Clean the burners and drip trays regularly to prevent grease buildup. Avoid harsh chemicals, as they can damage the seasoning. For tougher stains, mix water and vinegar, apply heat, and scrub gently. Proper post-cooking care ensures your Blackstone grill remains in excellent condition and ready for the next use.
7.2 Deep Cleaning and Restoration
For a deep clean, remove all grates and burners, soaking them in warm soapy water. Scrub the griddle surface with a stiff brush and baking soda paste, then rinse thoroughly. Re-season the griddle if needed. Use a degreaser on tough stains and grime buildup. Avoid abrasive cleaners to protect the seasoning. Dry and apply a thin oil layer to maintain the surface. Regular deep cleaning prevents rust and ensures optimal performance. This process restores your Blackstone grill to its original condition, keeping it durable and ready for years of use.
User Manual and Resources
Your Blackstone grill comes with a detailed user manual, providing step-by-step instructions, troubleshooting tips, and warranty information. Visit the official website for downloadable PDF manuals, model-specific guides, and additional resources to enhance your grilling experience.
8.1 Navigating the User Manual
The Blackstone user manual is your go-to guide for mastering your grill. It includes detailed assembly instructions, safety precautions, and troubleshooting tips. Start with the table of contents to quickly find specific sections, such as setup, maintenance, and warranty information. Pay attention to model-specific details, as instructions may vary. The manual also provides step-by-step guides for seasoning and cooking techniques. For convenience, manuals are available online as downloadable PDFs, ensuring easy access anytime. Refer to the manual regularly to optimize your grilling experience and address any issues promptly.
Troubleshooting Common Issues
Troubleshooting common issues with your Blackstone grill? Address ignition problems by cleaning burners and ensuring proper gas flow. Fix leaks by inspecting hoses and tightening connections.
9.1 Identifying and Solving Leaks
Identifying and solving leaks on your Blackstone grill is crucial for safety and performance. Start by inspecting the propane hose and connections for any visible damage or wear. Use a soapy water solution to detect gas leaks—bubbles will form if a leak is present. Tighten all connections firmly and replace any damaged components. Regularly check for loose fittings and ensure the propane tank is turned off when not in use. Addressing leaks promptly prevents potential hazards and ensures efficient grilling; Always follow manufacturer guidelines for repairs and maintenance.
9.2 Fixing Ignition Problems
Ignition issues on your Blackstone grill can be frustrating but are often easy to resolve. First, ensure the propane tank is turned on and the regulator is properly connected. Check for blockages in the burner ports or igniter holes, as food debris or dirt can prevent proper ignition. Clean these areas with a small brush or toothpick. If the igniter isn’t sparking, inspect the electrode for damage or corrosion and replace it if necessary. Always follow shutdown procedures correctly to avoid gas buildup. If problems persist, consult the user manual or contact Blackstone customer support for assistance.

Accessories for Enhanced Grilling
Enhance your Blackstone grilling experience with essential accessories like griddle mats, scrapers, and covers. These tools help maintain your grill and ensure optimal cooking performance every time.
10.1 Essential Accessories for Blackstone Grills
To elevate your grilling experience, consider these must-have accessories:
– Griddle mats for easy food release and cleanup.
– Scrapers to maintain your griddle’s surface.
– Covers to protect your grill from the elements.
– Seasoning oils to keep your griddle in prime condition.
These tools ensure your Blackstone grill performs optimally and lasts longer, enhancing both your cooking and maintenance routines for years to come.

Recipe Ideas for Blackstone Grill
Explore a variety of delicious recipes, from hearty breakfast skillets to mouthwatering dinners. The Blackstone grill’s versatility allows for endless creativity, ensuring every meal is a success.
11.1 Breakfast Recipes
Start your day with delicious breakfast recipes on your Blackstone grill! From fluffy pancakes to savory omelets, the griddle’s even heat ensures perfect cooking. Try a hearty breakfast skillet with scrambled eggs, crispy bacon, and golden hash browns. Achieve a flawless sear on French toast or cook eggs Benedict to perfection. The grill’s versatility allows for endless creativity, whether you’re making breakfast burritos or a decadent breakfast pizza. With proper temperature control and oil usage, your morning meals will be nothing short of extraordinary. Elevate your breakfast game and enjoy a flavorful start to your day!
11.2 Dinner Recipes
Elevate your evening meals with mouthwatering dinner recipes on your Blackstone grill! From perfectly seared steaks to flavorful chicken dishes, the griddle’s versatility shines. Try cooking tender salmon fillets with a citrus glaze or achieve restaurant-quality sears on ribeye steaks. Roasted vegetables like asparagus and Brussels sprouts crisp up beautifully, while cast-iron skillets filled with hearty beef stew or garlic shrimp add a rustic touch. Experiment with different cooking oils and sauces to enhance flavors. Whether you’re grilling, sautéing, or pan-frying, your Blackstone grill ensures a delicious and memorable dinner every time. Get creative and savor the perfect meal!
Advanced Grilling Techniques
Master advanced grilling methods to elevate your Blackstone cooking. Achieve perfect sears, explore diverse cooking oils, and refine temperature control for consistently exceptional results every time.
12.1 Achieving the Perfect Sear
Achieving the perfect sear on your Blackstone grill requires precise temperature control and proper oiling. Preheat the griddle to medium-high heat, ensuring it reaches 400°F–450°F. Lightly oil the surface with a high-smoke-point oil like avocado or grapeseed oil. Pat dry your food to remove excess moisture, then place it on the griddle. Avoid moving the food during the searing phase to allow a crust to form. Cook for 2-3 minutes per side, depending on the thickness, to achieve a golden-brown, caramelized crust that enhances flavor and texture.
12.2 Using Different Cooking Oils
Choosing the right cooking oil for your Blackstone grill enhances flavor and prevents sticking. Plant-based oils like avocado or grapeseed are ideal due to their high smoke points, perfect for searing. For a smoky flavor, try rendered animal fat like bacon grease. Always apply a thin, even layer to the preheated griddle using a paper towel. Avoid low-smoke-point oils like olive oil, as they can burn. Regularly cleaning the griddle after use prevents oil buildup and maintains its seasoning. Experiment with different oils to find your preferred taste and texture for optimal grilling results.

Warranty and Customer Support
Blackstone grills come with a warranty covering defects in materials and workmanship. For support, contact their team via phone, chat, or email during business hours. Model numbers, found on the unit, are required for assistance.
13.1 Understanding Your Warranty
Your Blackstone grill warranty covers defects in materials and workmanship for a specified period. Typically, the griddle surface is covered for 5 years, while other components like burners and frames may have a 1-year warranty. Registration is often required to activate coverage. The warranty does not cover damage from normal wear, misuse, or improper maintenance. For detailed terms, refer to the provided warranty document or contact Blackstone’s customer support. Understanding your warranty ensures protection and peace of mind for your investment in a high-quality grilling experience.
Mastering your Blackstone grill involves understanding its setup, maintenance, and proper usage. By following the guidelines outlined in this guide, you can ensure optimal performance, safety, and delicious results. From seasoning to advanced cooking techniques, this resource equips you with the knowledge to enhance your grilling experience. Remember to refer to your warranty for coverage details and explore Blackstone’s customer support for any assistance. With practice and creativity, you’ll unlock the full potential of your grill. Happy grilling and enjoy the culinary adventures ahead!